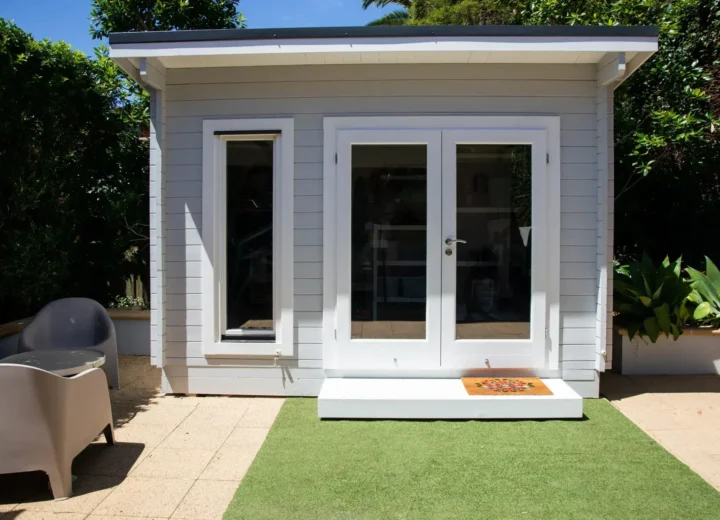

Plan garden room electrics early, before the base, cable route and interior layout are fixed. A small garden office with lighting and laptop charging has very different requirements from a year-round room with electric heating, gym equipment, workshop tools or a garden bar.
A garden room can usually have a fixed electrical supply, but there is no standard installation. The right design depends on the intended use, which appliances may run together, the distance from the house, the cable route and the condition and capacity of the existing installation.
This guide focuses on planning the supply and preparing for electrical work. For the wider project, including the building, base, insulation and permissions, see the wider guide to planning a garden room.
Before you start: what to prepare
Do not start by choosing a cable, consumer unit or protective device. Those are design decisions for the electrician responsible for the work. Prepare the information that will affect the design instead.
- A clear description of how the garden room will be used now and in future.
- A list of appliances, fixed equipment and proposed lighting.
- Approximate measurements from the house supply point to the garden room.
- A sketch of the proposed route, including paths, lawns, drainage, trees and planned landscaping.
- Photos of the existing consumer unit and any relevant external walls or access points.
- A simple plan showing sockets, switches, heating, ventilation and external lighting.
Arrange for an appropriately competent or qualified electrician to assess the site before any trench is dug or the route is permanently covered. They need to agree the installation method, account for existing underground services and specify how the route should be protected and reinstated.
Step 1: Define how the garden room will be used
Start with the room’s intended use. Write down what will happen there day to day, rather than relying on the building type alone.
- Garden office: computers, monitors, broadband equipment, task lighting, chargers and possibly heating or cooling.
- Year-round hobby room: lighting, heating, ventilation, audio equipment and occasional kitchen appliances.
- Garden gym: lighting, fans, treadmills or other powered equipment, plus heating if used in colder months.
- Workshop: tools, extraction equipment, task lighting and equipment with higher starting demand.
- Garden bar: refrigeration, lighting, music and potentially food preparation equipment.
- Occasional-use summer house: a more modest requirement, often centred on lighting and a limited number of sockets.
Electric heating, hot water equipment, cooking appliances and workshop machinery can alter the electrical brief substantially. If the room may later become a gym, office or studio, say so at the outset. It is easier to allow for a realistic future use during design than to alter a finished route later.
Step 2: Make an appliance and lighting schedule
There is no single safe figure for a garden room’s electrical demand. Build an appliance schedule instead. Check each product label, manual or manufacturer specification for its rated power, then note when and where it will be used.
| Item | Rated power | Likely to run at the same time? | Location and notes |
|---|---|---|---|
| Ceiling and task lighting | Record from product information | Yes or no | Include internal and external lights |
| Computers, monitors and chargers | Record from product information | Yes or no | Allow for desk layout |
| Heating or cooling equipment | Record from product information | Yes or no | Important for year-round use |
| Refrigeration or food equipment | Record from product information | Yes or no | Relevant to bars and hobby rooms |
| Gym or workshop equipment | Record from product information | Yes or no | Include all planned machinery |
| Outdoor equipment | Record from product information | Yes or no | Lighting, pond equipment or charging |
This is a planning worksheet, not an electrical design calculation. It gives the electrician a clearer picture of likely demand and helps avoid a quote based on an incomplete description of the room.
Step 3: Plan the electrical load with an electrician
Identify what may operate at the same time. Adding every nameplate rating together does not necessarily reflect normal use, but assuming high-demand items will never overlap can be equally misleading.
A home office might use lighting, computer equipment and heating during a winter working day. A garden bar may run lighting and refrigeration while a kettle or other appliance is in use. Workshop demand can differ sharply from that of a quiet office, particularly when equipment starts.
The electrician should assess likely demand, future additions, supply capacity, route length and required protective measures as part of the installation design. Do not select cable size, circuit ratings, earthing arrangements or protective devices from a generic online example. These choices depend on the individual property and installation conditions.
Step 4: Check the existing house supply
A garden room supply begins at the house, so the existing installation matters. Spare space in a consumer unit does not, by itself, show that there is adequate electrical capacity for an outbuilding.
The electrician may need to consider the condition of the existing installation, available supply capacity, existing circuits, earthing and bonding arrangements, isolation requirements and the effect of adding a detached building. Give them access to the consumer unit and share any available paperwork for previous electrical work.
If the house installation is older, has known faults or lacks recent documentation, raise this before requesting a final quote. It may affect the work required, but it is better to identify the issue during planning than after the garden room is complete.
Step 5: Agree the route before groundworks begin
The route between the house and garden room affects both cost and safety. Mark the likely path on a site sketch and discuss it with the electrician before finalising the base, paths, decking, planting or drainage.
Record the approximate distance and identify anything that could complicate access or future maintenance:
- Existing drains, water pipes, gas services or other buried utilities.
- Tree roots, retaining walls, paved areas and narrow access points.
- Changes in ground level or areas that regularly become wet.
- Future patios, raised beds, fencing or landscaping.
- Where the supply will enter the house and the garden room.
Outdoor and buried electrical routes need to be designed for their environment, including the risk of water exposure and mechanical damage. Do not excavate, install or backfill a route until the agreed method, service checks and responsibilities are clear.
Ground conditions also matter when planning the building itself. Our guide to garden office foundations and base planning explains the wider questions that should be resolved before construction begins.
Step 6: Plan sockets, lighting and controls inside the room
Plan enough fixed outlets in sensible positions to avoid a permanent collection of extension leads. Start with the furniture layout. Desk positions, gym equipment, workbenches, fridges, seating and storage all influence where power is needed.
- Place sockets near desks, media equipment, refrigeration and planned appliances.
- Include lighting for the main room, work surfaces, entrances and any external path or door area.
- Consider how heating and ventilation equipment will be controlled.
- Decide whether you need data cabling, Wi-Fi equipment or a dedicated place for network hardware.
- Leave room for realistic future changes, such as a second desk or a different use for the room.
- Consider damp and splash risks when deciding where accessories and appliances will be located.
For an office-focused layout, see our separate guide to planning power, lighting and heating for a garden office.
Step 7: Understand the safety and compliance responsibilities
Homeowners can prepare the brief, measure the route, choose socket locations and discuss practical access. Electrical design, installation, inspection, testing and certification should be handled by an appropriately competent or qualified electrician in line with the rules that apply to the property and work.
Electrical safety standards, building regulations, planning permission and any notification or certification process are separate matters. A detached garden room is not automatically outside electrical requirements simply because it is an outbuilding.
Requirements and administrative routes can differ across England, Wales, Scotland and Northern Ireland. The precise position depends on the jurisdiction, the nature of the work and the property. Ask the electrician how the proposed work will be designed, tested and documented, and check any applicable local requirements before work starts.
Step 8: Compare quotes on the same basis
A low quote is difficult to compare when the route, internal fit-out or documentation is unclear. Give every electrician the same appliance schedule and sketch, then ask what is included and excluded.
- Does the quote include design and assessment of the existing supply?
- Who is responsible for route preparation, excavation and reinstatement?
- Does it include supply work at the house and work inside the garden room?
- Are sockets, switches, internal lighting and external lighting included?
- Does it allow for heating, ventilation, data provision or particular fixed equipment?
- What testing, certification and other completion paperwork will be provided?
- What assumptions have been made about access, distance and ground conditions?
- What allowance has been made for future capacity, if any?
Ask for assumptions in writing. This reduces the chance that a necessary part of the work appears later as an unexpected extra.
Common mistakes to avoid
- Treating an extension lead as a permanent supply. It can create trip, weather-exposure and damage risks, and is not a substitute for a properly planned fixed installation.
- Planning only for summer use. Electric heating can change the brief quickly when a room becomes a winter office or hobby space.
- Forgetting simultaneous use. Consider what will operate together, not just what may be used at different times.
- Digging before the electrical design is agreed. A route that seems convenient may be unsuitable once site conditions and other services are considered.
- Assuming spare ways mean spare capacity. Capacity requires assessment of the wider installation, not a visual check alone.
- Installing too few sockets. This encourages ongoing reliance on trailing leads and adaptors.
- Leaving future uses out of the brief. Mention planned heating, gym equipment, a workshop bench or a possible second workstation from the start.
Garden room electrics pre-installation checklist
- Define the room’s primary use and plausible future use.
- Complete an appliance, heating and lighting schedule.
- Measure and sketch the proposed route from house to garden room.
- Identify known drains, pipes, cables, trees and landscaping constraints.
- Plan furniture, socket locations, lighting zones and external lighting.
- Gather available information about the existing consumer unit and prior electrical work.
- Arrange a site assessment before trenching or finalising access routes.
- Compare written quotes with the same scope and assumptions.
- Confirm the testing, certification and applicable compliance process before work begins.
- Keep all completion paperwork with the garden room’s property records.
Next action
A clear electrical brief makes it easier to design a safer, more useful garden room and compare quotes fairly. Once the power supply is planned, return to Garden Rooms: The Complete UK Guide for broader decisions about building type, insulation, heating, foundations, maintenance and overall project planning.